Purpose: The Plans Module within Planning and Self-Study is the institution’s repository for program assessment reports; including student learning outcomes, evidence-based achievement of those outcomes, and data-informed actions to seek continuous improvement.
A printable P&SS User Guide in available here (pdf)
Step 1: Accessing Planning & Self-Study
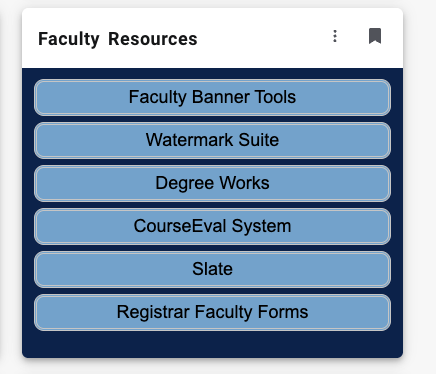
- The link for Planning & Self-Study is located in My Citadel Portal within the Faculty Resources tile, under “Watermark Suite”.

- Once, you have follow the link to the Watermark Platforms, you will see the following landing page:

- Follow the link for Planning & Self-Study:
- Note the landing page above may look different depending on user access.
- From the Home module from the left-hand menu (see screenshot below). This will show you summary page of all your projects and areas to which you have been assigned a “Lead”

Step 2: Creating or Editing Outcomes
The first time you enter an assessment report you will have to add outcomes. After the first year, you can select previous outcomes (all or some) to be added to the plan for that year and you will still have the option to add new outcomes if needed.
If you are starting a plan for the first time, you will see a screen like this when you enter your program
To make a new outcome select Create Outcomes

You have the option to choose between Learning Outcomes and Success Outcomes
Academic programs tend to be more heavy on Learning Outcomes (what students will be able to do, know, and/or value)
Student support services and administrative units will have primarily, if not exclusively, Success Outcomes

Add a short title for the outcome in the Outcome Title box and the full outcome statement in the Outcome Description box
Tags are optional – they allow for categorization of outcomes at the administrative level

Here is a (fictional) example from my test program, BS in Aardvark Biology:

Once you have added outcomes, you can carry them over from year to year and edit them, if needed.
In the example, below, outcomes were created for 2023-2024 and will be carried over to the next year.
Use the Select Outcomes button

Next, use the checkboxes to select the outcomes to include and the Apply Selection button to add them.
Note, you can also add new outcomes once you have incorporated those you are using from the previous year.

To edit the existing outcome once if has been added to your plan, use the Add/Edit Outcomes button

Step 3: Adding Assessment Measures
To add an assessment measure, click the short title of an outcome and then the plus sign for a New Measure

Begin by adding the method by which the assessment data will be gathered, adding the course (if applicable) and a measure title (short title)

Then add information about the results collection process.
Use the Align Results button if you collected your measure in Student Learning & Licensure.
Add a target for desired level of performance (this should be rigorous).
Add a description of the assessment measure.
Attach any supporting documents.

Once all the fields above have been added, use the Add button in the upper right-hand corner to include the measure in your assessment report.
Step 4: Adding Results to a Measure
Once a measure has been added to your outcome, results can be added by using the Add Results Button under the short title of your measure

There are four options for entering results:
1. Integrate an assignment evaluated in SL&L which will import summarized data from the rubric.
2. Manually enter the count of how many students met or did not meet the target.
3. Upload as assessment results file (not recommended)
4. Send emails and collect scores from faculty (not recommended)


Here is an example of entering results by entering the count of students who did or did not meet the target.
